Essential DIY Refrigerator Home Appliance Maintenance
When it comes to keeping your kitchen running smoothly, the refrigerator takes center stage. It’s not just a storage unit for your favorite snacks and groceries; it’s a vital appliance that deserves a little extra care. In this article, we’ll delve into two crucial do-it-yourself (DIY) refrigerator maintenance tips that can not only enhance your refrigerator’s performance but also extend its lifespan.
Appliance Grandmasters: Serving Greenville, Easley, Spartanburg, Greer, Simpsonville, Piedmont, Taylors.

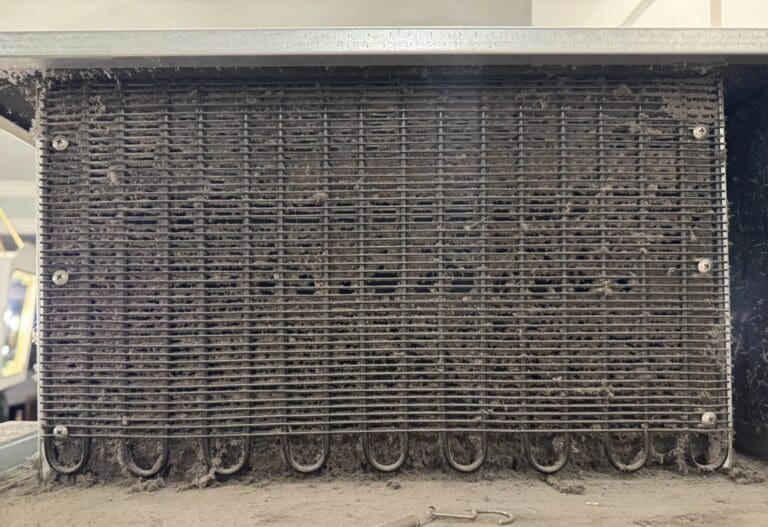
The condenser coils, often overlooked in the back or underneath your refrigerator, are the unsung heroes that keep things cool. Their primary job is to release heat from the refrigerator, ensuring it operates efficiently. However, over time, these coils can become magnets for dust and debris, hampering their ability to function optimally.
Why does it matter?
When the condenser coils are clogged, the refrigerator has to work harder to maintain the desired temperature. This not only results in increased energy consumption, but can also lead to a shorter lifespan for the appliance. Regularly cleaning these coils is a simple yet powerful DIY refrigerator maintenance task that can have a significant impact on your refrigerator’s efficiency.

How to DIY Clean Condenser Coils:
Unplug the Refrigerator: Before you start cleaning, unplug the refrigerator to ensure safety.
Locate the Coils: Depending on your refrigerator model, the condenser coils can be found at the back or underneath. Consult your user manual if unsure.
Vacuum or Brush: Use a vacuum cleaner with a nozzle attachment or a soft brush to gently remove dust and debris from the coils. Ensure thorough cleaning without causing damage.
Repeat Every 6 Months: Aim to clean the condenser coils every six months or more frequently if you have pets that shed.
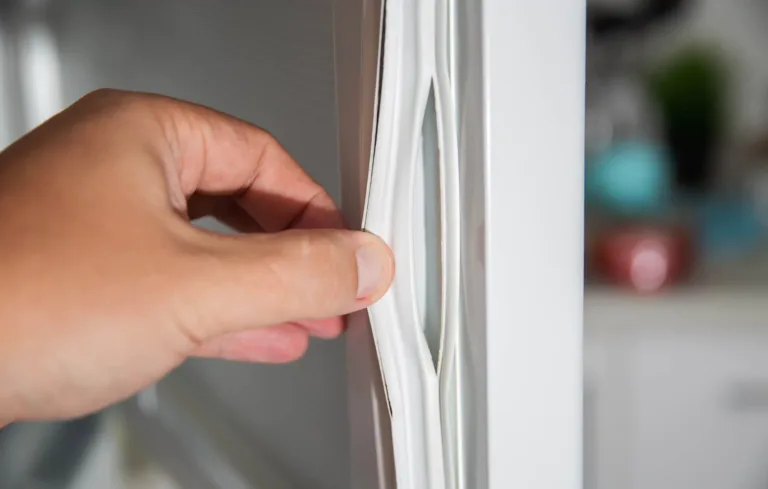
The door seals, also known as gaskets, might seem like a minor component, but they play a crucial role in maintaining the internal temperature of your refrigerator. A faulty seal can lead to energy inefficiency and compromise the freshness of your stored items.
Why does it matter?
A damaged or worn-out door seal allows cold air to escape, making the refrigerator work harder to maintain its set temperature. This not only puts a strain on energy consumption but can also impact the overall performance of the appliance.

How to DIY Check and Replace Door Seals:
Inspect for Wear: Regularly inspect the door seals for any signs of wear, tear, or damage. Look for cracks, gaps, or areas where the seal is no longer snug against the refrigerator frame.
Dollar Bill Test: Perform the dollar bill test by closing the door on a dollar bill or a piece of paper. If you can easily pull it out, the seal might be compromised.
Replace Damaged Seals: If you notice any issues during inspection or the dollar bill test, it’s time to replace the door seals. You can purchase replacements from the refrigerator’s manufacturer or authorized dealers.
Ensure Proper Alignment: When replacing the seals, ensure they are properly aligned and sit flush against the refrigerator frame. Misalignment can lead to gaps, affecting the seal’s effectiveness.
By incorporating these simple yet effective DIY refrigerator maintenance tips into your routine, you’re not just maintaining an appliance; you’re ensuring the heartbeat of your kitchen runs smoothly. Regularly cleaning condenser coils and checking/replacing door seals might seem small in the grand scheme, but their impact on energy efficiency and the overall lifespan of your refrigerator is considerable. Show your refrigerator a little tender loving care, and it will keep your food fresh and your kitchen humming happily for years to come.
Don’t feel like tackling appliance maintenance on your own?
No worries! At Appliance GrandMasters, we’ve got your back. Enjoy peace of mind with our comprehensive Home Appliance Maintenance Plan. Let the experts handle it, so you can enjoy the convenience of smoothly running appliances without the DIY stress. Your home deserves the best – leave the maintenance to us!

Formerly known as Mr. Rogers Appliances, we rebranded our appliance repair company to Appliance GrandMasters in June 2020. Since then, we have focused on developing our brand to be customer-oriented.
Fixing appliances has become a passion for us. We enjoy challenges and we are always studying to become the very best.
We accomplish swift and top-notch service by employing efficient and friendly customer service procedures that guarantee accurate answers and solutions.
Our approach involves the careful selection and comprehensive training for the necessary skills to fulfill our customers’ needs. Through these strategies, we strive to consistently provide exceptional service.